How to use EVA foam
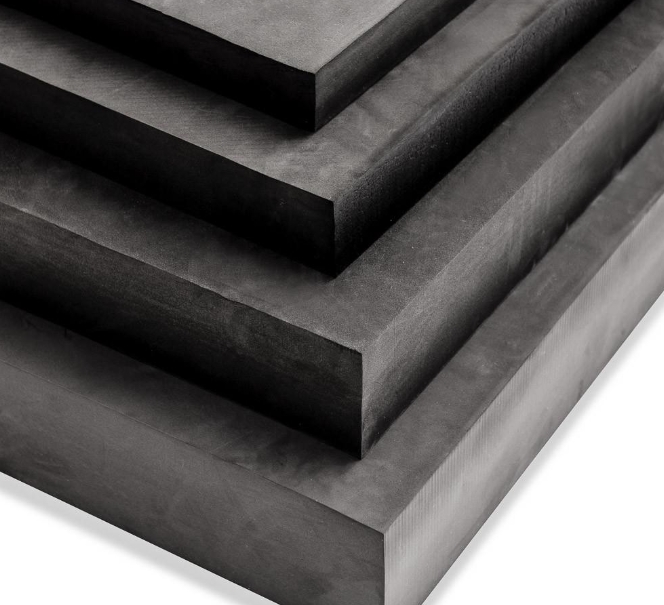
The general process for any EVA foam project follows these steps:
-
Design & Pattern Making
-
Cutting
-
Shaping (with Heat)
-
Gluing
-
Sanding & Detailing
-
Sealing
-
Painting & Finishing

Required Tools & Materials
| Tool Category | Recommended Items |
|---|---|
| Cutting | Sharp utility knife, X-Acto blades, self-healing cutting mat, metal ruler. |
| Shaping | Heat gun (a hair dryer is not hot enough), protective gloves. |
| Gluing | Contact cement (e.g., Barge, DAP, or EVA Foam-specific brands). A cheap brush for applying it. |
| Sanding/Detailing | Sandpaper (60-120 grit), Dremel rotary tool, wood burning tool. |
| Sealing | Mod Podge, PVA glue, Flexi-Paint, or Plasti Dip. |
| Painting | Acrylic paints, primer, brushes, sponges. |

Step-by-Step Guide
1. Design and Pattern Making
-
Plan Your Project: Sketch your prop or armor piece. Break it down into simple 3D shapes.
-
Create Patterns (Pepakura): The best method is to create a 2D blueprint that will fold into your 3D shape.
-
You can find free patterns online for common props (e.g., Skyrim, Destiny armor).
-
Use software like Pepakura Designer to create patterns from 3D models.
-
For simple shapes, use poster board or cardstock to create your own patterns through trial and error.
-
-
Transfer to Foam: Cut out your paper patterns and trace them onto the EVA foam using a pen or marker.
2. Cutting the Foam
-
Use a Sharp Blade: A dull blade will tear the foam and create ragged edges. Change blades often.
-
Technique: Don't try to cut through in one pass. Use a metal ruler as a guide and make several light scoring passes until you cut through.
-
Cutting Curves: For tight curves, use a fresh X-Acto blade and rotate the foam, not the knife, for smoother lines.
3. Shaping with Heat
-
Why Heat? Applying heat makes the foam temporarily soft and pliable. It will hold its new shape once it cools down.
-
How to Do It:
-
Put on heat-resistant gloves.
-
Wave the heat gun back and forth over the area you want to shape. Do not hold it in one spot or you will burn and bubble the foam.
-
Once the foam becomes soft and flexible (it will often try to curl), quickly form it to your desired shape. You can use your body, a form, or another object as a mold (e.g., wrap a bracer around your arm).
-
Hold it in place until it cools and becomes rigid again (usually 15-30 seconds).
-
4. Gluing Pieces Together
-
The Best Glue: Contact Cement. This creates a flexible, incredibly strong, and nearly invisible bond that is perfect for seams.
-
How to Use Contact Cement:
-
Apply a thin, even layer of cement to both surfaces you want to join.
-
Let it dry until it is tacky to the touch (not wet—this usually takes 5-10 minutes).
-
Carefully align the two pieces and press them together. The bond is instant and permanent, so get it right the first time!
-
Once joined, you can't reposition it.
-
-
Alternative: Hot glue is good for quick temporary holds or attaching very small details, but it is not strong enough for major structural seams.
5. Sanding and Detailing
-
Sanding: Use coarse sandpaper (60-80 grit) or a Dremel with a sanding drum to smooth out rough edges, create bevels, and blend seams. This is crucial for a professional look.
-
Adding Details:
-
Bevels: Cut edges at a 45-degree angle to make pieces look less like stacked foam and more like forged metal.
-
Grooves & Scratches: Use a wood burning tool or the edge of a soldering iron to burn grooves, panel lines, scratches, and textures into the foam. Always work in a well-ventilated area when doing this.
-
6. Sealing (The MOST Important Step for Painting)
-
Why Seal? EVA foam has a porous surface that will soak up paint and make it look splotchy. Unsealed foam will also show its "cell structure" texture. Sealing creates a smooth, paintable surface.
-
How to Seal:
-
Choose a sealer. A popular and cheap method is a 50/50 mix of Flexible Mod Podge and black acrylic paint or plain PVA glue. For a more flexible finish, use Plasti Dip (spray or brush-on).
-
Apply 2-3 thin coats with a wide, soft brush or sponge, making sure to get into all the crevices. Let each coat dry completely before applying the next.
-
Once sealed, the surface should feel smooth and slightly shiny.
-
7. Painting and Finishing
-
Primer: After sealing, you can use a primer (Krylon or Rust-Oleum primers for plastic are usually safe, but ALWAYS test on a scrap piece first to ensure the solvent doesn't melt the foam).
-
Painting:
-
Base Coat: Apply your main color with a brush or spray paint.
-
Dry Brushing: Use a light color and a dry brush to lightly highlight raised edges and details. This makes them pop.
-
Washing: Use a thin, dark paint (e.g., black acrylic mixed with water) to flow into recessed details and grooves. Wipe the excess off the raised areas. This creates depth and shadow.
-
-
Weathering: Add scratches, smudges, and dirt with sponges and thin brushes to make your prop look worn and realistic.

Pro Tips and Safety
-
Ventilation: Always work in a well-ventilated area, especially when using contact cement, a heat gun, or spray paints.
-
Sharp Blades: Be careful! Always cut away from your body.
-
Heat Gun Caution: A heat gun gets extremely hot. Be mindful of what is around it and always wear gloves.
-
Test First: Always practice new techniques, test glues, and try paints on a scrap piece of foam before applying them to your main project.
With practice, these steps will become second nature. EVA foam is an incredibly forgiving and rewarding material.
What is EVA foam sheet?
A comprehensive guide to EVA foam sheets
Related Article